
 Figma
 API
 Web to code extension
 Adobe XD
 Discord
 Twitter
 GitHub


 Blog

How to Publish a Website with Hermes Agent: Build, Review, Deploy10 min read
Reading Time: 7 minutesHermes Agent can build and test a website, but it is not a public website host. To publish, deploy its reviewed files through an authorized hosting provider or bring a suitable app into AgentGrid.io and explicitly publish the approved artifact. The important difference is between a local preview, a private review link, and a live address anyone can open.
This guide follows a community astronomy club landing page from brief to public URL. You will learn what to ask Hermes to produce, how to verify the site in a browser, and where a human approval gate belongs. Keep production credentials and DNS changes outside the initial build request.
Build with Hermes and AgentGrid.io →
How to publish a website with Hermes Agent and AgentGrid.io
A Hermes Agent session can end with a page or app that lives only on your machine. Move a specific deliverable into a workspace where people can inspect it before it goes public. AgentGrid’s quickstart separates workspace creation, artifact work, review, and publishing; its agent connection options include MCP or an agent invite.
1. Set up the workspace and invite deliberately
Sign in to AgentGrid.io, choose a workspace, and check its access before connecting Hermes. AgentGrid lists Hermes among coding agents supported by its CLI route: ask Hermes to run npx @animaapp/cli@latest login and complete the human sign-in. For a pre-scoped agent, an administrator can instead use Agent administration → Invite an agent, select the workspace, clear unneeded Share and Publish capabilities, and deliver the one-time link privately. All four capabilities are selected by default, and creating an invite alone does not connect the agent. Confirm its identity and workspace access after redemption.
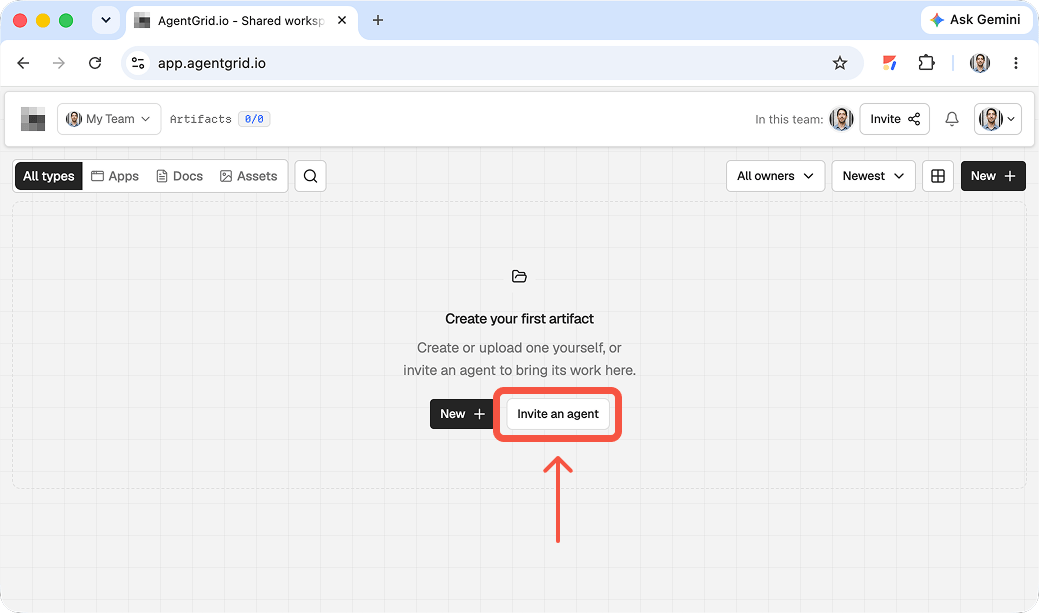
If you would rather keep the connection manual, skip the agent invite and upload the finished files yourself. Hermes can produce local artifacts, but the agent’s execution permissions and AgentGrid’s workspace access are different boundaries. A connected assistant should only receive the scope it needs for this deliverable.
2. Create the artifact
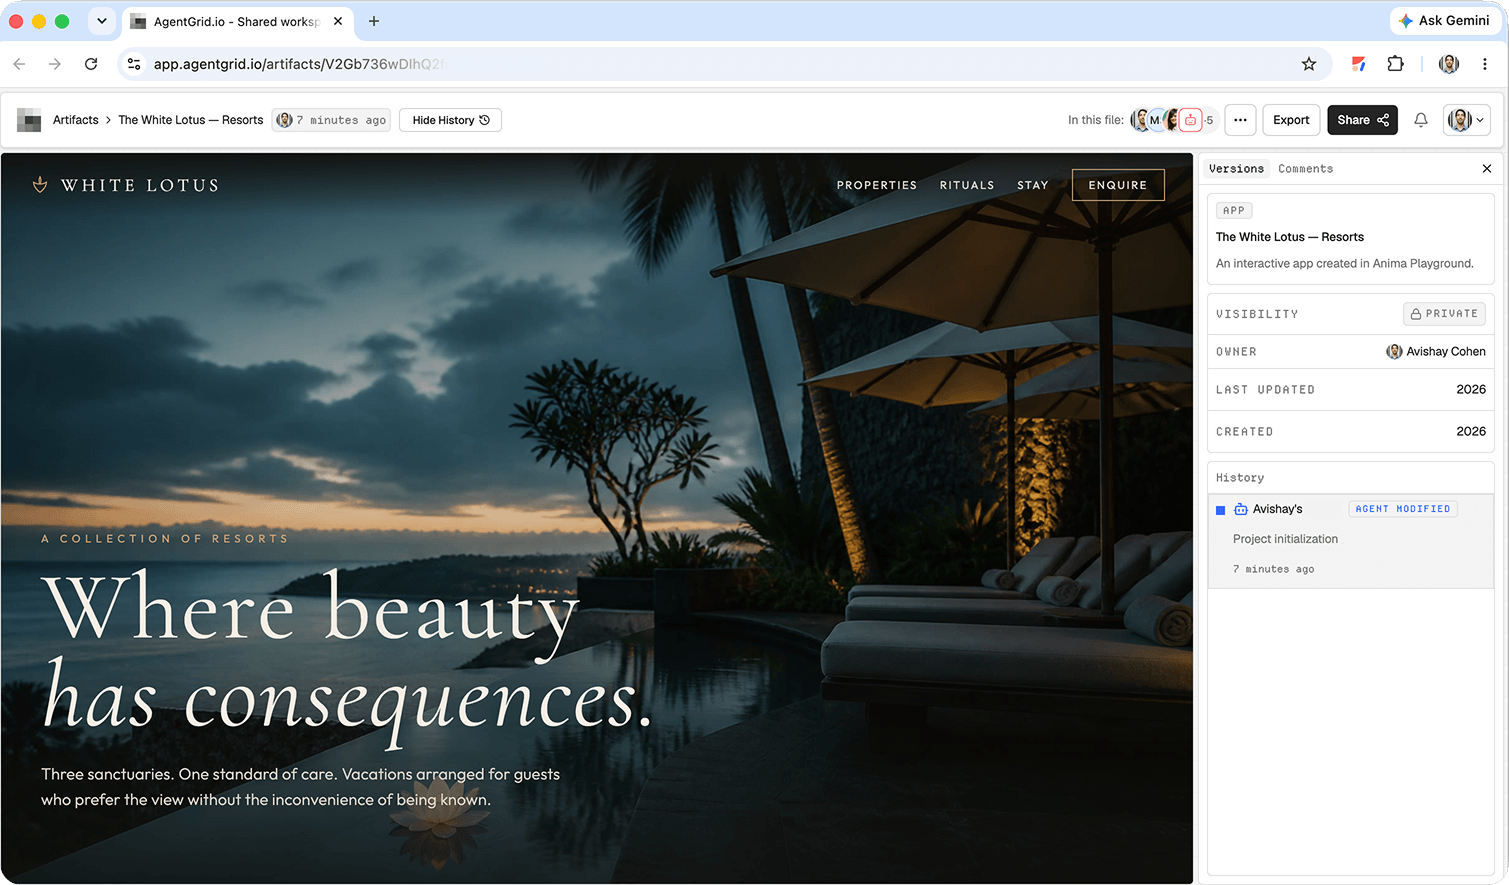
Ask Hermes for a bounded output, such as an HTML prototype with a short README stating what is real and what is placeholder. If you connected Hermes through the supported AgentGrid route, ask it to create or update the relevant artifact there, then open that artifact in your browser. Otherwise, collect the final files into a ZIP and use AgentGrid’s ZIP import, or create a new document for a text-only deliverable. Verify the imported page, assets, and wording against the local version. An artifact in a workspace is the reviewable object, not proof that the agent’s entire conversation or filesystem moved with it.
3. Review with a person
Open the artifact preview and ask a teammate to leave comments on concrete issues: a broken button, unsupported assertion, missing attribution, or inaccessible contrast. AgentGrid supports comments on artifacts. Resolve the feedback in the artifact, then re-open the result and confirm the revision actually addresses it. Keep a person responsible for content, security, and the decision to release; an agent-generated draft is not an approval.
4. Publish only the approved version
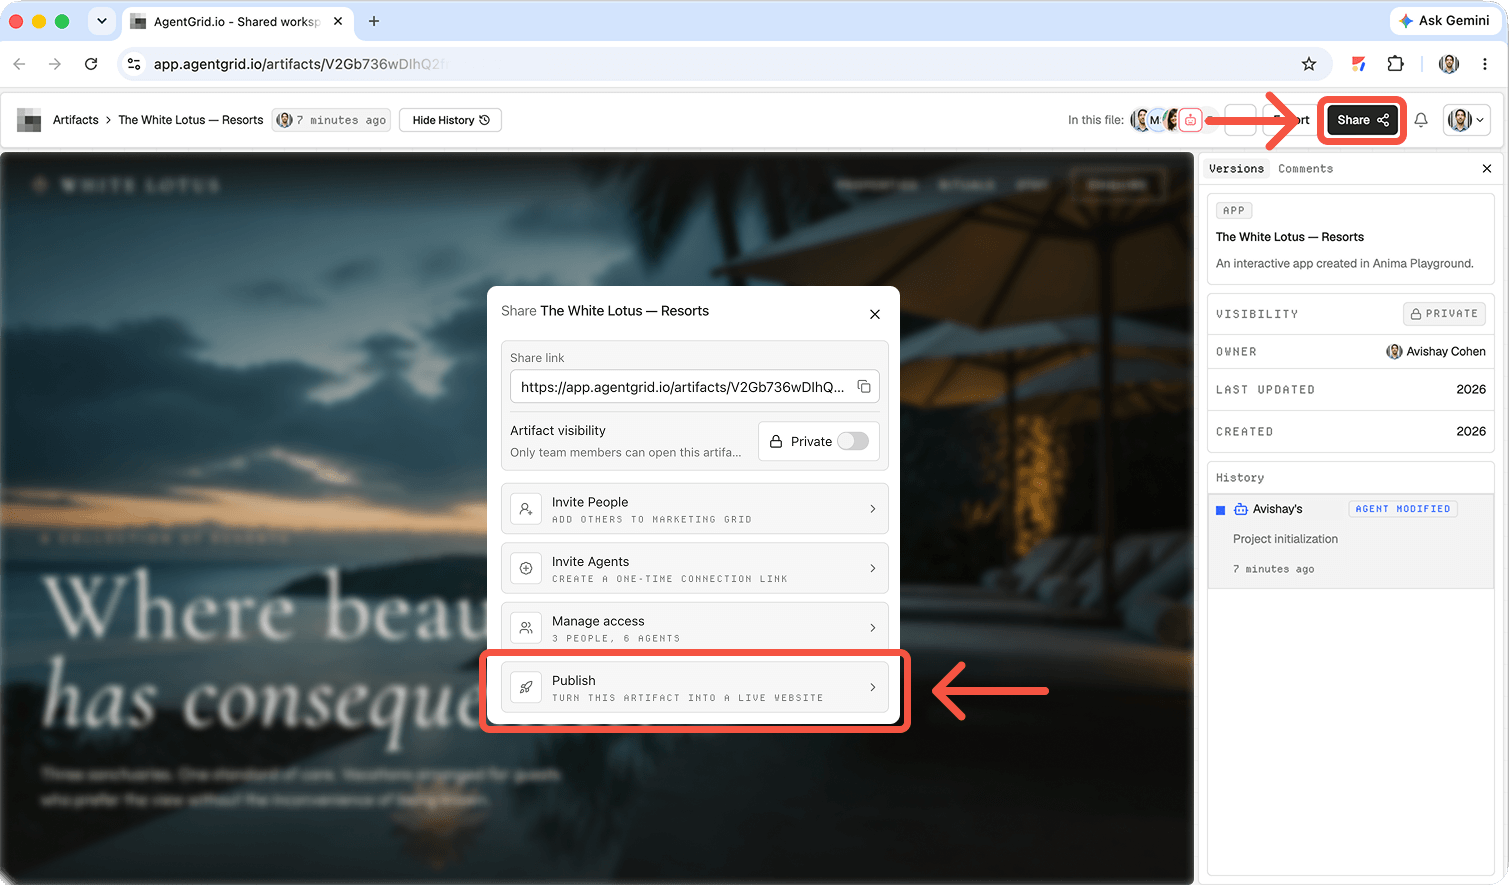
When the owner signs off, use AgentGrid’s publish flow for the selected artifact and check the resulting public page in a separate browser session. Publishing is a separate action from team review, and later artifact edits do not automatically update the published site. If you change the artifact after approval, review the revision and publish again. Share the public URL only after checking it renders and contains no private instructions, credentials, or test data.
Choose the publishing path before you build
If you already have a repository, deployment pipeline, and host, keep that route. Hermes can prepare files, run the project build, and help inspect the result, but the host owns deployment and the domain. If collaborators need a shared, versioned app to review, AgentGrid.io is a separate artifact and publishing layer. Importing a folder copies it; subsequent edits to the local folder do not automatically update the artifact.
How to publish a website with Hermes Agent
1. Give Hermes a scoped brief
Start Hermes in its CLI or a configured chat interface. Its official documentation describes terminal, file, web, and browser tools, but availability depends on your setup and enabled toolsets. Ask it first to inspect the working directory rather than assuming an existing project path. For this example, build a landing page for a community astronomy club with events, membership details, and an email contact link.
Ask for project files, a local preview address, and a test report. Hermes can run checks and browse the page when configured, but distinguish executed tests from recommendations. Open the website yourself.
Make the scope testable: ask for one homepage, an events section with approved dates, membership information, and a working contact destination. Tell Hermes which assets are licensed for use. If dates or photos are missing, request visible placeholders and a list of unresolved decisions rather than invented facts. Request the precise project path, build command, and output location so another person can reproduce the result.
2. Test the real page, not the chat answer
Open the local preview on desktop and a narrow viewport. Follow each navigation link, check focus order and image descriptions, and confirm that event dates and venue details are correct. If the page uses a contact form, verify where submissions go. Do not publish a form that only appears to work. Check titles and descriptions for the pages you intend search engines to discover.
What should the prelaunch review cover?
- Content: check names, dates, venue, contact address, and every claim against the approved brief.
- Navigation: click every menu item and call to action on a phone-sized and desktop viewport.
- Accessibility: tab through controls, check meaningful image descriptions and heading order, and inspect contrast.
- Search basics: confirm a descriptive title and meta description, readable URLs, and appropriate indexability for the chosen host.
- Build evidence: record the exact build command, result, and any failed checks rather than a generic “tested” label.
3. Pick where the website will live
Your existing deployment stack: Ask Hermes to prepare the correct build output and deployment instructions for your repository and host. It may run the deployment if you explicitly authorize that action and supply appropriate access. The host, not Hermes itself, provides the public URL. Protect environment variables and confirm the exact target before any production write.
AgentGrid.io: Connect a command-capable Hermes instance using the documented npx @animaapp/cli@latest login flow. You approve a verification link and choose the agent’s identity, workspace access, and capabilities. If you prefer a manual handoff, import the project folder or ZIP into AgentGrid.io. Neither approach implies a built-in Hermes publishing button or an automatic sync between a local directory and an artifact.
4. Share the draft with the reviewers
Ask Hermes to create or update an app artifact in the correct AgentGrid.io workspace once connected. For manual import, choose New → Upload Folder or New → Import from ZIP. Include the source files, assets, and an entry point; omit local secrets, dependency directories, and unrelated notes. Open the artifact preview and compare it with your local preview. If the build relies on unsupported server behavior or external services, resolve that gap instead of assuming the imported artifact is deployment-ready.
In AgentGrid.io, select the intended workspace and inspect the imported artifact’s files, assets, entry point, and rendered app. The documented folder or ZIP import has size and file-count limits, so trim dependencies and unrelated build output. A repeated import creates a new artifact rather than synchronizing the old one; work on the existing artifact for subsequent revisions.
5. Publish the approved version
After resolving feedback, open the artifact’s publishing control and confirm the public deployment. Keep publish capability with a human unless an agent has a specific, approved reason to use it. Open the returned public URL while logged out. Recheck layout, navigation, images, and contact paths in the deployed version. AgentGrid.io keeps later edits unpublished until someone deliberately publishes the next version.
Custom domains require an eligible paid plan. Use the DNS values shown in the publishing flow and verify HTTPS before launch.
Verify the deployed site, not just the publish confirmation
Copy the final address into a private or logged-out browser session. Check the headline, current event details, images, menu, and contact path on the actual live domain. Confirm the deployed revision matches the approved preview. If you connected a custom domain, wait for the platform to verify the supplied DNS records and test HTTPS before switching campaign links or retiring a working address.
Why the artifact matters after launch
A website changes after launch. In a shared artifact, reviewers can inspect history and restore an earlier version if a revision fails. With a separate host, keep its repository and deployment history as the source of truth.
Looking at adjacent approaches? See our Muse AI website example, agent-driven app publishing guide, and Claude Design website workflow.
Frequently asked questions
Does Hermes Agent publish websites natively?
Hermes can use enabled tools to build and assist with deployment, but its CLI and chat are not themselves a public website host. Use a hosting provider or AgentGrid.io to create the live URL.
Do I have to let Hermes publish?
No. Give it the permissions needed to draft and test, then have a person inspect and publish the approved artifact.
Make the handoff part of the build
Ask Hermes for source, tests, and a preview first. Put that work where the team can review it, then publish the version everyone actually approved.